Paladin Suit Tutorial

Paladin Suit Tutorial
Keep reading
More Posts from Oceangodz and Others
Studying physics is essentially being taught a simple structure, and then told ”actually, scratch that, the truth is actually far more complicated” over and over again until we reach the point where we still don’t know the truth, only that we do not have it.

They really said that…
every rapist and pedophile needs to be beaten and then burned alive 😍👌
☽ Sea Knot Magick: a Wish Bracelet Spell ☾

This spell in particular is very special to me as it was one of my first successful spells when I started practicing in the 7th grade. It’s a perfect example of Sea/Lunar Witchcraft and Knot Magick!
What you need:
☾ a Full Moon
☾ 5 different colored embroidery threads - one color to represent the moon (white, silver, even yellow), one color to represent the ocean, a color to represent your birth stone, a color to represent the wish (red/pink for love, green for luck/prosperity, etc.), and your favorite color. The length of the threads is dependent upon the type of bracelet you choose to make–I did a double chevron, throwback to friendship bracelets (▰˘◡˘▰)
☾ A conch shell
☾ A symbol (a piece of jewelry that has sentimental value; could’ve been given to you by a loved one, or perhaps you choose a piece that represents the sea)
☾ Blue lace agate, which can be used as a wish stone, or stones that correspond with your wish
☾ Rain water, salt water, or sea water; I recommend water charged by the moon, your crystals, or blessed by Poseidon/Aphrodite/Selene/your patron
☾ (Optional) a Sea Altar or altar honoring a Sea Deity
What to do:
Take the embroidery threads and begin to make a bracelet of your choice out of them; it doesn’t matter what pattern you choose, be it chevron, double wave, diamond, etc.
While you make each knot, visualize your energy flowing into the bracelet. Charge it with your wish. I even repeated my wish as a mantra in my head during the process as a type of affirmation as well, focusing on the outcome of my wish. While making the bracelet (which, depending on the pattern, can take a while), have some ocean-scented candles or incense burning! Let the bracelet sit on an ocean themed altar when you aren’t working on it.
Upon finishing it, let the bracelet soak in a bowl of your salt/rain/sea water for 10 minutes. Use blue lace agate or your stone(s) of choice to charge the water beforehand–remember to research whether or not the crystals are safe to sit in water overnight! If the water hasn’t already been blessed, this would be a good opportunity to place the bowl on your altar, place an offering beside it, and ask a Sea Deity or your patron to bless it!
Wrap the bracelet around your symbol and place it underneath the conch shell for 1 full day
On the next full moon, place your bracelet outside in the light of the full moon.
Wear the bracelet until the wish comes true!
When I did this spell originally, I had confused the new moon symbol with the full moon symbol on my calendar by accident. The night it was supposed to sit out in the moonlight, I figured the moon had already risen and fallen by then, so I went to bed and had a dream about the full moon. The next morning, I woke up and noticed it had already started to take effect. I remember realizing that magick worked in strange ways, and I was astonished and how fast it worked–I highly recommend this spell for sea witches! Feel free to incorporate the appropriate herbs or an incantation!
At work I review a lot of signatures and today it just clicked.
Scribbles.
Imagine if aliens come to us and realise that instead of difficult to fake dna, or fingerprints, or retinas, we have this scribble.
This is my scribble. No one else can use it because its mine.
Not so much as Humans are Weird as Humans are Toddlers…

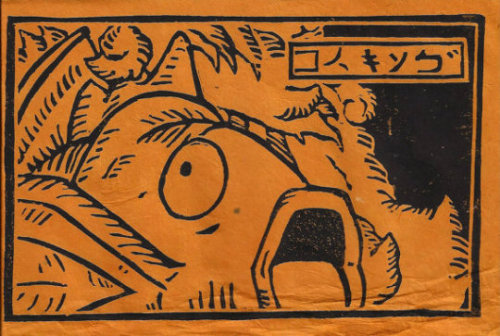
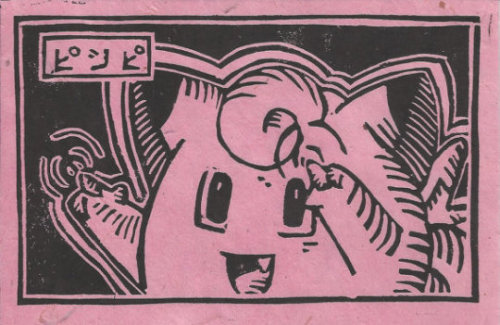
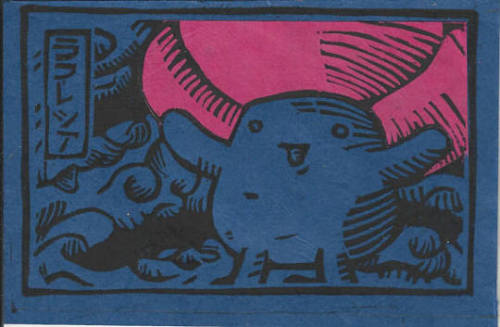
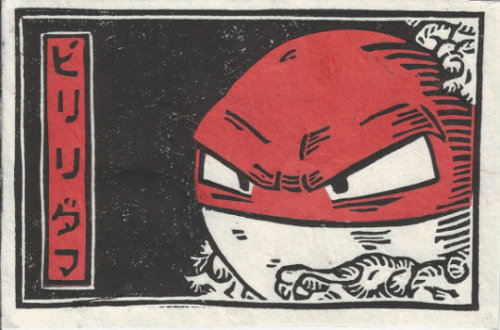
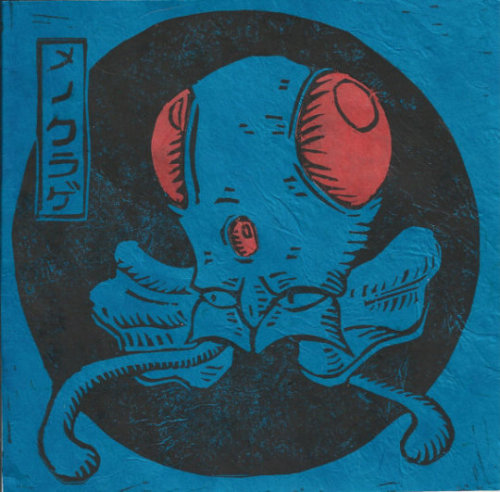
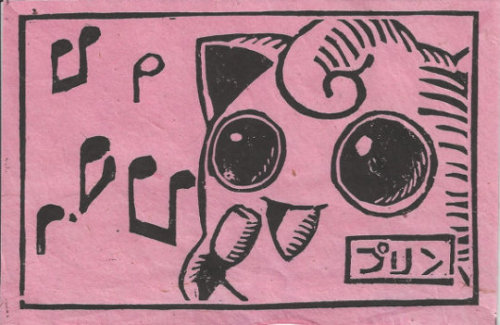
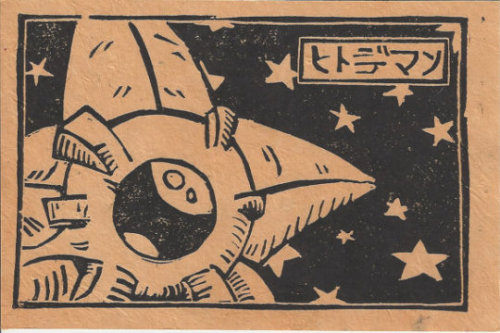
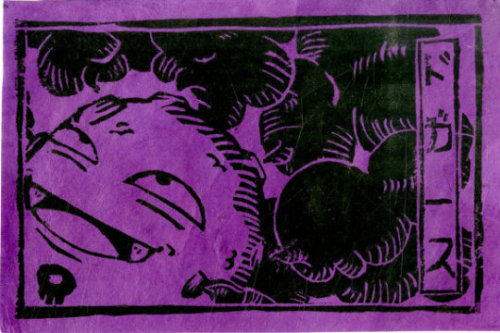
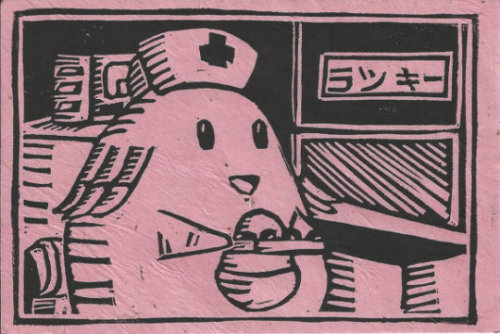
Japanese Linocut Pokemon Artwork made by basquared
Crystals For Motivation
Topaz
Citrine
Carnelian
Ruby
Red tiger’s eye
Apatite
Calcite
a VOLTRON Paladin torso armor pattern
Hey dudes~ so someone asked if i was willing to share my armor patterns, and the answer is HELL YEAH.
So, here’s the dealio with these:
1. I used a dress form sized to me to make these.
( that’s 5″5, ~150lbs, 39-40″ at the bust lv,32″ at the waist.and 16″ across the shoulders.)
they can resize, but that’s on you. ;D
know your measurements, know where things line up.
2. These are designed with EVA foam as the intended material. Stuffed fabric could also work. (maybe.)
3. I’m all for sharing creativity, but for frack or quiznak sake, don’t repost and say you made these. don’t remove the text. its irritating and ugly fine, but the notes on the armor are important.
(it will confuse people and hurt my feelings okay? let’s be a cool fandom everyone.)
Let’s start!

I recommend using a ruler. since this is on pattern paper (a godsend, btw) the distance between the little blue marks is all a perfect square inch.
the EASIEST way to achieve symmetry is to do one half and fold and copy it to the other.
*I haven’t done the V shape yet, but can add it later or just make a proper tutorial thing.


Note: registration marks! also, this is designated as the LEFT shape, and connecting to the BACK piece of the armor. not the front. (flip it over and you got the right side!)
Now, I realized after cutting the foam and making sure i can get my head through the hole, this could get interesting really quick when getting the chest piece on and off, especially since my suit zips up the back…
SOLUTION: DO. NOT. GLUE. THE. BACK. PIECE. TO THE SIDES.
(or do, if you can fit. I can’t. broad shoulders.)
instead,on the back, I’m going to glue/staple/glue some black stretch fabric, and shape the gap to fit at an angle. it should sit flat when in place, and stretch when you need it to.
that way, you can get it on and off easily.
**I will update on how this goes.

this is where folding the pattern for symmetry is REALLY handy.
and a good example of how great this paper is.
the length of my guard is 20 inches.it lines up with the marks on the torso pieces.
the line going across as labeled is the light level. (EL tape goes there! diffuse your LED’s guys! be careful of your circuits!)
I still need to figure out the shoulder pieces, but this is what i got so far!
ALSO:
for anyone new to EVA foam:
https://www.youtube.com/user/evilted40/featured
Evil Ted Smith’s youtube channel is a friggn gold mine, guys.
if you do use EVA, please be careful. its difficult to cut, foam gives off fumes when heated or burned, and knives are sharp and most dangerous when slightly dull. use a dremel to fix an edge, not a knife. (it wont work.)
I’d also be happy to make a tutorial for using a dress form for this kind of thing!
feel free to message me personally if you have any questions, happy and safe cosplaying~!!


Patterns, refs, and more+
So this con season I made myself Pidge and a Shiro paladin costumes to wear, with pretty good results. The worst part of it though was the amount of time I spent drafting patterns, so I figured this might be a good resource for anyone else looking to make armor in the future.
This is all based on my measurements (a 5′1″ average-ish build with… bigger thighs), so you’ll likely need to make adjustments to have this fit yourself, but hopefully this makes building your own cosplay a little easier. Materials, patterns and everything under the cut. Hope it helps!
Keep reading
Where my mutuals with tinnitus at make some noise
-
 ashkazora liked this · 1 year ago
 -
 prettyguardian-sailorbiscuit liked this · 1 year ago
 -
 hyugogo reblogged this · 1 year ago
 -
hyugogo liked this · 1 year ago
-
 taidegtabass liked this · 1 year ago
 -
 catamaranthenonnewtonianfluid liked this · 1 year ago
 -
 mystitrinqua reblogged this · 1 year ago
 -
 theglitterdark liked this · 1 year ago
 -
theglitterdark reblogged this · 1 year ago
-
 recovering-redditor liked this · 1 year ago
 -
 cazhmaer liked this · 1 year ago
 -
 headspacedad reblogged this · 1 year ago
 -
 inuyasha-sit-boi reblogged this · 2 years ago
 -
inuyasha-sit-boi liked this · 2 years ago
-
 tim0-priv liked this · 2 years ago
 -
 i-will-die-halfway-after-never liked this · 2 years ago
 -
 thatsnotmygato liked this · 2 years ago
 -
 penguin-effect-cosplay reblogged this · 2 years ago
 -
penguin-effect-cosplay liked this · 2 years ago
-
 hornedviper6 liked this · 2 years ago
 -
 icarounico liked this · 3 years ago
 -
 parkerludoka liked this · 3 years ago
 -
 alex-van-gore liked this · 3 years ago
 -
 zeufrozina liked this · 3 years ago
 -
 unapologeticallme reblogged this · 3 years ago
 -
unapologeticallme liked this · 3 years ago
-
 emotionalsupportspoon reblogged this · 3 years ago
 -
emotionalsupportspoon liked this · 3 years ago
-
 courageinthemidst liked this · 3 years ago
 -
 cryptid-things111 liked this · 3 years ago
 -
 darkherogoran reblogged this · 3 years ago
 -
darkherogoran liked this · 3 years ago
-
 ghostisunavailable liked this · 4 years ago
